
Multi-sensory (or multimodal) instruction can be broken down into four pathways:
- Auditory (Sense of Hearing)
- Visual (Sense of Sight)
- Tactile (Sense of Touch or Fine Motor Movement)
- Kinesthetic (Body Movement or Gross Motor Movement)
Typically, one of these modalities is usually predominant in each student. Some prefer to use their hands when learning, while others might need to see a visual representation of an image or picture to grasp the concept.
As Dr. Samuel Orton indicated in his research, brain dominance has a substantial impact on learning to read. Both hemispheres of your brain act and react, think and process, and solve problems in very specific ways. Each is quite different from the other, and one is usually dominant.
When a lesson utilizes all four learning pathways, it capitalizes on student strengths and strengthens their weaknesses. By using lessons that engage multiple modalities, educators have a much better chance for students to grasp a concept on initial instruction.
While some still think the Orton-Gillingham reading approach only belongs in special education or reading intervention programs, we have seen firsthand the type of impact it can have on all students.
Multi-Sensory Activity Examples
Students learn at different paces. However, by using multi-sensory strategies, students are given multiple opportunities through various delivery styles to reach their full learning potential.
Here are five multi-sensory activities that you can implement in your classroom today!
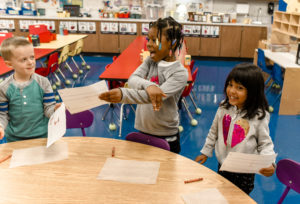
Read it, Build it, Write it
This multimodal activity is perfect for teaching Red Words, or irregular words (i.e., ‘said’ or ‘does’). For these words that don’t fit the expected spelling patterns, students need to be able to master them and identify the irregularities.
In this activity, students are given a sheet of paper with three boxes on it, labeled “Read It”, “Build It,” and “Write It.” Each student is also given flashcards that have Red Words already written on them, magnetic or block letters, and a writing tool.
The students and the teacher will read the irregular word that is in the “Read It” box. With the teacher’s help, students can identify what makes the word irregular. Identify what is unexpected in the spelling pattern. From there, your students will use magnetic letters to build the word they just read in the “Build It” box. Once they’ve successfully built the word, the student writes it in the “Write It” box.
Writing in Sand/Shaving Cream

This multi-sensory technique incorporates visual, auditory, and tactile pathways to reinforce letter-sound correspondence.
Using cookie sheets, plastic trays, tables, paper plates, or other mediums, teachers can have sand prepared or shaving cream ready ahead of time. The teacher calls out a known sound. The student repeats the sound, then uses their pointer and middle fingers to write the letter that makes that sound while verbalizing the letter name and sound (/b/ b says /b/). By using their fingers to write, they are accessing thousands of nerve endings that transfer patterns to the brain.
If you choose to use this strategy for whole words instead of letters, make sure you are choosing phonetic words that follow expected spelling patterns.
Air Writing
This is a similar activity to writing in sand or shaving cream but uses gross motor (and is less messy!) Air writing, also called sky writing, helps reinforce the letter and sound that each letter makes through muscle memory.
When air writing, have students stand and air write with their dominant arm. Students should move from their shoulder to promote large muscle movement. Tell your students to visualize the letter in a specific color. As students air write, have them verbalize the letter name and sound.
Arm Tapping
This activity is aimed at helping students master irregular words through multi-sensory review.
To begin this activity, have a stack of cards that contain the words your students are studying. One-by-one, state the word and hold the card in front of you with your non-dominant hand. Make sure the card is at the eye-level of your students as they need to be focused on seeing the words.
Always have students arm tap left to right using their dominant hand. Right-handed students place their right hand on their left shoulder. Left-handed students place their left hand on their right wrist. Say each letter of the word while you tap down your arm using your flat hand. When students have tapped out each letter, state the whole word again while sweeping left to right (shoulder to wrist or wrist to shoulder). Think of it as underlining the word.
Blending Boards
Blending boards are used for students to practice segmenting sounds and blending the sounds into syllables. This helps prepare students for decoding multisyllabic words. Our IMSE blending boards can hold up to three large card stacks that feature individual letters, as well as blends and digraphs.
These are placed in CVC (consonant vowel consonant) order on the board. The teacher places a hand over each card while students state each sound. Then the teacher sweeps a hand over all of the letters while students state the word or syllable.
If students struggle with the CVC pattern, try using the VC pattern. Starting with a continuant sound versus a stopped sound will also help struggling students.
Additional Resources
The possibilities are endless when you bring multi-sensory strategies into your classroom. The strategies we listed are just the tip of the iceberg. For more insights and strategies, visit the links below:
- The IMSE YouTube Channel has several helpful videos about teaching open and closed syllables, three-part writing drills, and more!
- A simple search of “Orton-Gillingham Activities” or “Multi-sensory Activities” on Pinterest reveals hundreds of exciting ideas you can take straight to your classroom. IMSE also has a Pinterest page.
- Be sure to log in to your imse.com account to check out all our other free resources.
IMSE believes that all children should be able to read. To achieve this end, IMSE wants to bring Orton-Gillingham to all educators to give children the best literacy instruction possible.
Learn more about what you can do to improve literacy for all using the Institute for Multi-Sensory Education’s Orton-Gillingham training.
Please connect with us on Facebook, Twitter, and Pinterest to get tips and tricks from your peers and us. Read the IMSE Journal to hear success stories from other schools and districts, and be sure to read the OG Weekly email series for refreshers and tips.